Solar Mount Foundations and Pole Setting
Standard foundations for MT Solar mounts consist of steel poles embedded in concrete. They’re economical and efficient to install, and highly reliable for supporting solar mounts, while also retraining the usability of the land.
As a result of these and other advantages, MT Solar’s top-of-pole mounts can be used in more places, even when terrain, climate, and other factors would otherwise pose challenges. They’re consistent with the overall strength and simplicity of our approach to solar mount designs, installations, and maintenance.
Since they are the starting point of most installations, and they utilize elements that are not typically included with the mount kit, let’s go over some foundation and pole essentials and what to keep in mind as you plan and proceed with your solar project.
Foundation Basics
The standard design for top-of-pole mount foundations is a round or square concrete embedment. The concrete holds a steel pole, which supports the frame and array. Single-pole mounts use just one foundation and multi-pole mounts use one foundation per pole.
Foundation Shape
During the design stage, you’ll have the option to choose a square or round foundation.

Square Foundations – The vast majority of mounts use a square foundation, as they require less concrete. They measure 48 inches in length and width.

Round Foundations – Round foundations are typically used where any disruption of the ground must be kept to a minimum, such as for mounts agrivoltaics projects or where asphalt or pavement is already used. They measure 36 inches in diameter but typically need a greater depth and more concrete compared to square foundations.
Foundation Depth
Square and round foundation depths vary based on the mount’s design attributes, including ground clearance and tilt, and factors affecting the location, including wind and snow loads. Complimentary depth recommendations are specified in the calculation packet output by the Solar Mount Autodesigner.
Foundation Suitability and Soil Class
All mount foundation designs will work in soil classes 1 through 4 (U.S. Land Use and Soil Classification).
Foundations for Shallow Soil and Bedrock
Foundation depth can also be modified for sites with impenetrable terrain or shallow soil over bedrock. Typically, the foundation can be widened to provide comparable structural integrity. If you’re installing at a site that cannot be penetrated to full foundation depth, please contact us for guidance on alternatives.
Foundation Estimates and Custom Anchoring
Once you have the specs in your mount design’s calculation packet, you can use them to get estimates for cement. If you’re seeking a custom foundation or anchoring system for a mount, the calculation packet specs include all of the structural and load force details an engineer would need to design a suitable foundation.
Steel Pole Basics
MT Solar mounts are meant to be installed on steel poles. These are the same poles used in well-drilling, utility applications, propane transport, and similar applications.
Pole Sizes and Schedules
All mount designs will specify a Nominal Pipe Size (NPS) measurement and schedule. Standard pole sizes are 6, 8, and 10-inch NPS and standard pole schedules (thicknesses) are 40 and 80 sch.
Pole Treatments and Painting
It’s not necessary to use steel poles that have been galvanized, cold rolled, or treated. Raw steel, sometimes called black iron steel, is a perfectly sufficient pole material and more economical. Poles can be painted or coated to protect against rust. If the pole is painted before the mount is assembled and hoisted, touch-ups will needed to cover all scratches.
Pole Sourcing
For the vast majority of installations, it’s more economical and efficient to source steel poles from a supplier that’s local to the installation site. Steel recyclers, scrap yards, and utility hardware suppliers are all reliable options. All the specs a supplier will need are included in the mount’s calculation packet. We recommend buying poles at the standard 21-foot length and then cutting it to size.
The Foundation and Pole-Setting Process
The first steps of an MT Solar mount installation are getting the foundation(s) dug, the pole(s) set, and ensuring everything is stable and secure for the mount’s assembly and hoisting.
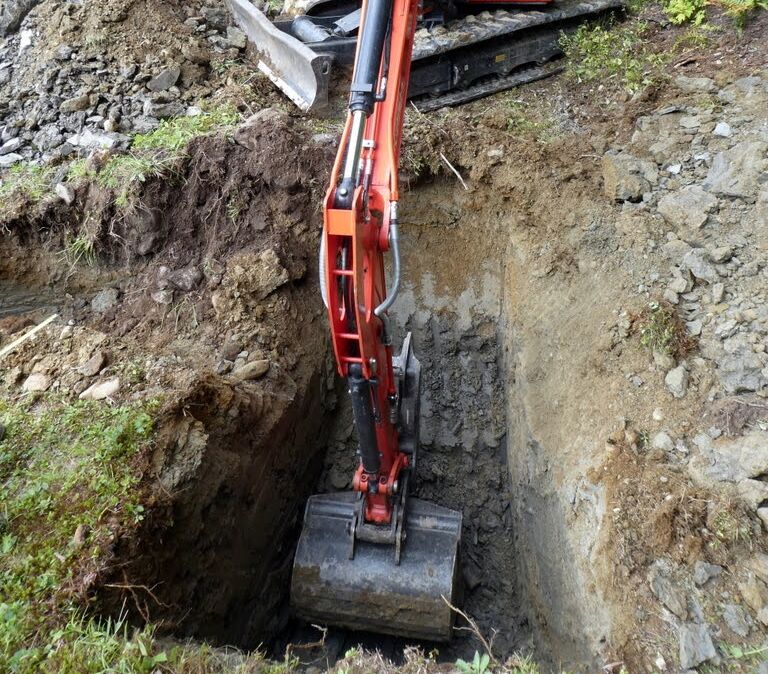
Digging the Foundation(s)
Excavating the ground to the required depth and size is the first step in laying the foundation. The process is similar to digging a hole for an embedded fence post on a slightly larger scale. With the excavator on site, trenches can be dug for the wiring, and grading can be completed after the concrete has set.
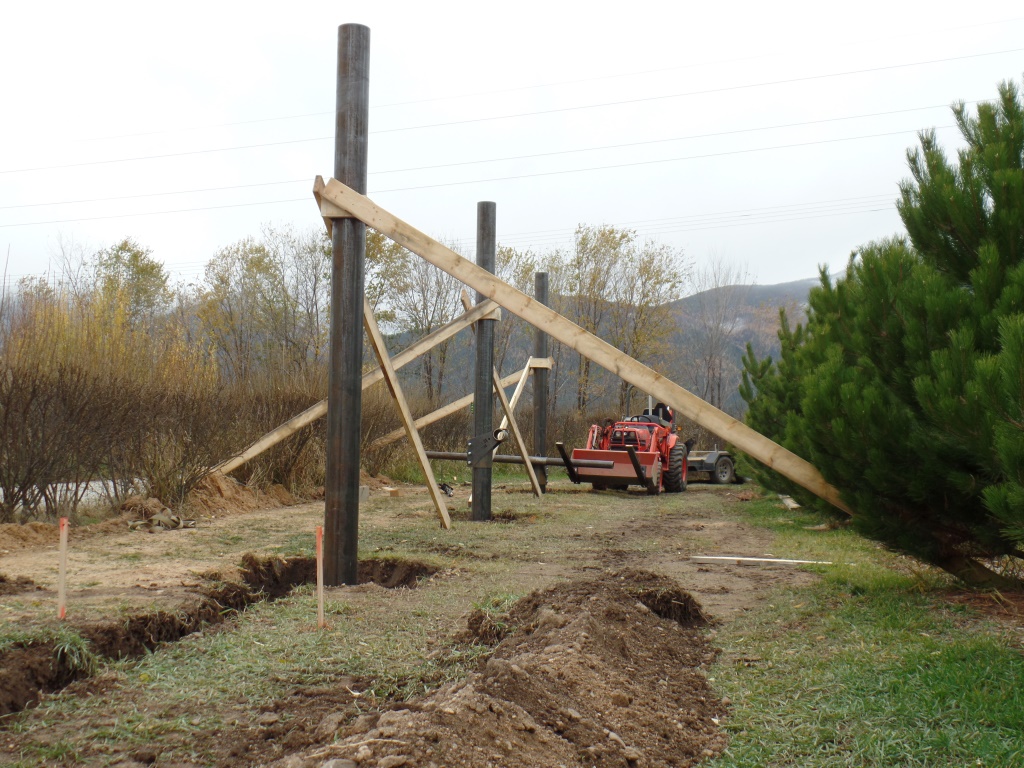
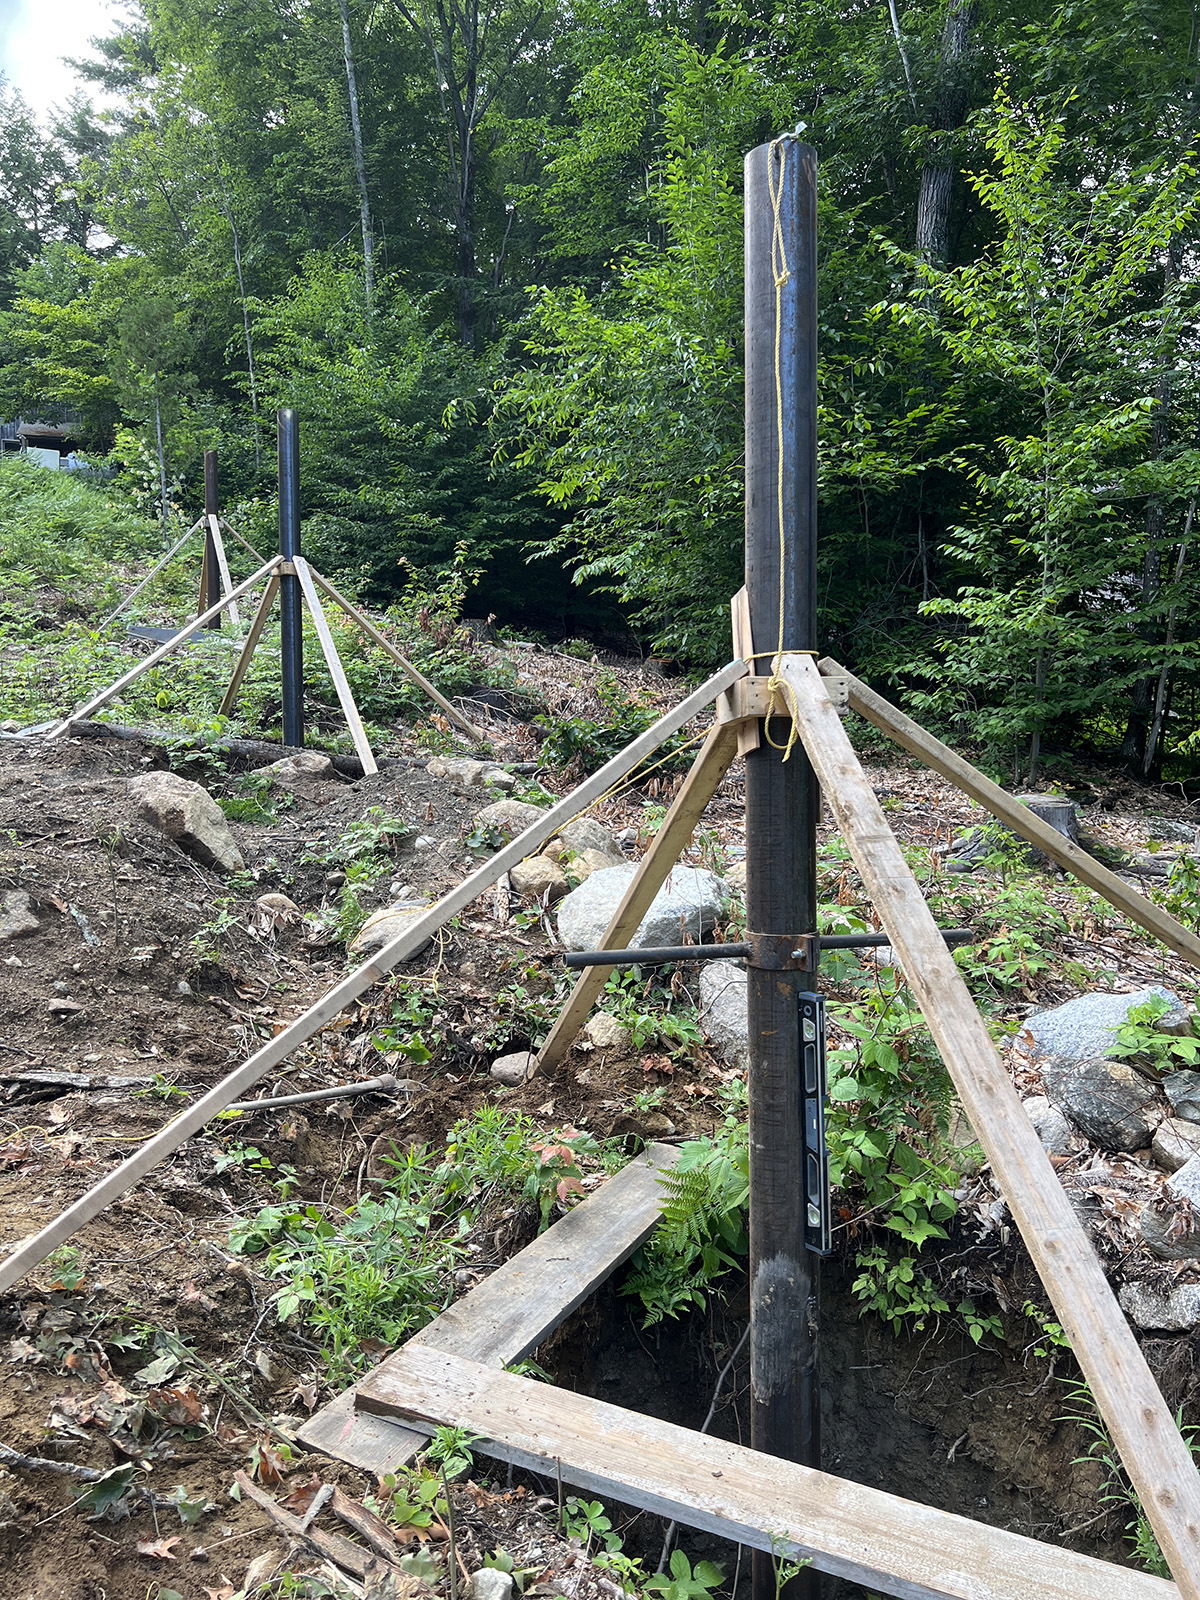
Bracing and Setting the Pole
Centering and stabilizing the pole is much easier with the help of the excavator. The pole can be chained to the bucket, lifted, and positioned upright so that it’s plumb with the bottom. Using 2x4s to create a collar and one or more supports angled against the ground is a simple but effective way to keep everything in place while ensuring final measurements and preparing to pour the cement.
Using Frames and Sonotubes
There’s no need to frame the foundation or use sonotubes to reinforce the sides. The foundation should come in direct contact with the compressed soil to ensure maximum integrity. However, if a tidy foundation edge is preferred, a shallow frame or portion of a sonotube can be used on the upper-most part, ideally no more than a foot deep from the surface. Outside of aesthetics, this is not necessary.
Running the Conduit
The conduit should be attached to the pole so there’s a one or two-inch gap along the length. This extra space will allow the u-bracket to move freely when the mount is assembled and hoisted. The conduit can attached before or after the foundation is poured.
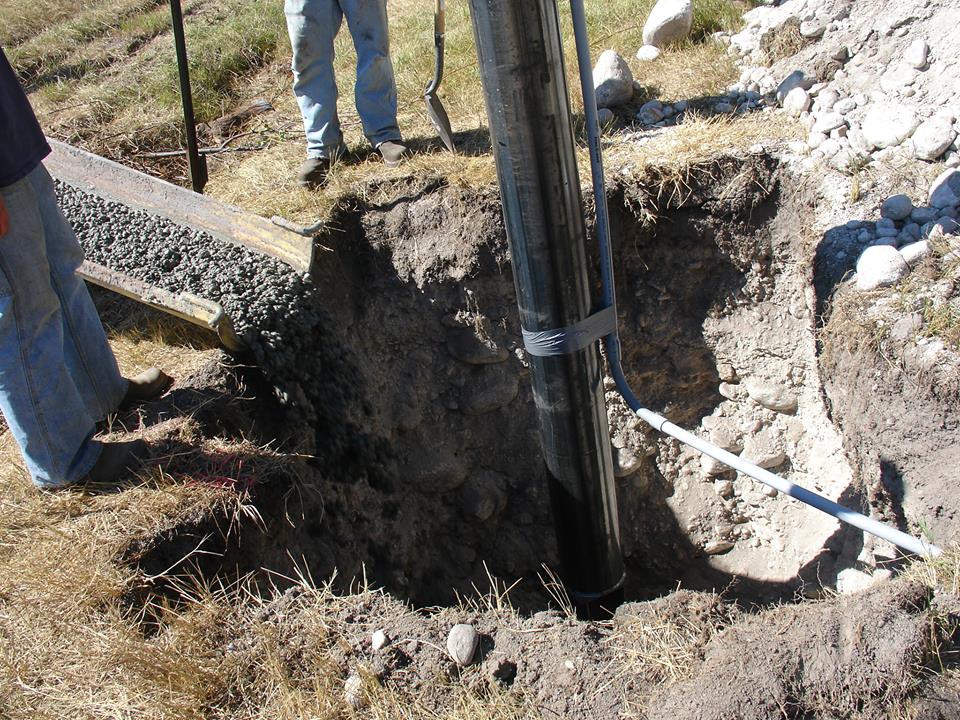
Filling the Foundation and Leaving the Pole Hollow
When filling the foundation, the pole should be left hollow. Filling the pole with cement could create vulnerabilities as the concrete within the pole cracks when the temperature fluctuates.
Pole Spacing and Adjustments
If you’ve installed a multi-pole mount and find a misalignment between the poles after the foundations have been set, you have a few options for making adjustments.
All MT Solar mounts have a built-in variance of three to four inches, which accounts for slight vertical misalignments. East-to-west pole spacing misalignments can be corrected by adjusting the pivot pipe. The pivot pipes allow for adjustments of up to one foot. When the ideal alignment is achieved, the pivot pipe’s lock collars will set the position.